Windows VM on Linux
In this post, I’ll share and document for my future use the process of creating a Windows 11 virtual machine on Linux using QEMU/KVM.
Why?
Well, if you, like me, prefer to use some Linux distro as your main system or, like me, don’t like Windows, but need to use Windows for some specific tasks, such as work, or some software that only runs on Windows, or games that only run on Windows (although this is no longer quite as true), or even for software development that needs to be tested on Windows, a virtual machine is a great solution.
Requirements
- A computer with Linux installed (preferably a distro that supports KVM, such as Ubuntu, Fedora, Arch, etc).
QEMU/KVM
As I’m an Arch Linux user, I’ll use the pacman package manager to install the necessary packages. If you’re using another distro, adapt the commands as needed.
sudo pacman -S qemu-full libvirt virt-manager virt-viewer dnsmasq- qemu-full: The hardware emulator and hypervisor.
- libvirt: Library for managing virtual machines.
- virt-manager: Graphical interface for managing virtual machines.
- virt-viewer: Tool for viewing virtual machines.
- dnsmasq: Lightweight DHCP and DNS server.
Windows 11 ISO
You can download the Windows 11 ISO directly from Microsoft’s website: Download Windows 11
VirtIO Drivers
For the integration between Windows and QEMU/KVM to work properly, you’ll need the VirtIO drivers.
This is because Windows 11 doesn’t natively recognize the virtual devices created by QEMU/KVM, such as the disk and network card.
Additionally, through these drivers, you’ll have better performance with almost native performance, since Windows will know it’s running on a virtual machine and will optimize resource usage.
To install on Arch Linux, you can use the following command:
sudo pacman -s virtio-winOr you can download directly from the official website: VirtIO Drivers
Host Configuration
Before starting to configure the virtual machine, let’s first configure libvirt to allow the current user to manage virtual machines without needing superuser privileges.
sudo usermod -aG libvirt $(whoami)
newgrp libvirt
Now, let’s start the libvirt service and enable it to start automatically on system boot:
sudo systemctl enable --now libvirtdLibvirt Configuration
During the VM installation on my machine, I had some issues with network access and also user permissions, so I had to make the following changes:
In /etc/libvirt/qemu.conf, uncomment the user line and change the value to your user
...

# The user for QEMU processes run by the system instance. It can be
# specified as a user name or as a user id. The qemu driver will try to
# parse this value first as a name and then, if the name doesn't exist,
# as a user id.
#
# Since a sequence of digits is a valid user name, a leading plus sign
# can be used to ensure that a user id will not be interpreted as a user
# name.
#
# Some examples of valid values are:
#
#       user = "qemu"   # A user named "qemu"
#       user = "+0"     # Super user (uid=0)
#       user = "100"    # A user named "100" or a user with uid=100
#
user = "your_username"

...
Additionally, I had to change the firewall backend to use iptables, in /etc/libvirt/network.conf
...

# Master configuration file for the network driver.
# All settings described here are optional - if omitted, sensible
# defaults are used.

# firewall_backend:
#
#   determines which subsystem to use to setup firewall packet
#   filtering rules for virtual networks.
#
#   Supported settings:
#
#     iptables - use iptables commands to construct the firewall
#     nftables - use nft commands to construct the firewall
#
#   If firewall_backend isn't configured, libvirt will choose the
#   first available backend from the following list:
#
#     [nftables, iptables]
#
#   If no backend is available on the host, then the network driver
#   will fail to start, and an error will be logged.
#
#   (NB: switching from one backend to another while there are active
#   virtual networks *is* supported. The change will take place the
#   next time that libvirtd/virtnetworkd is restarted - all existing
#   virtual networks will have their old firewalls removed, and then
#   reloaded using the new backend.)
#
firewall_backend = "iptables"
...
If you don’t have iptables installed, you can install it with the following command:
sudo pacman -S iptablesVirtual Machine Configuration
Now let’s get to the interesting part, which is configuring and installing the virtual machine.
Once you have everything installed and configured, you can start virt-manager (Virtual Machine Manager) from your system menu or by typing virt-manager in the terminal or searching in your favorite launcher.
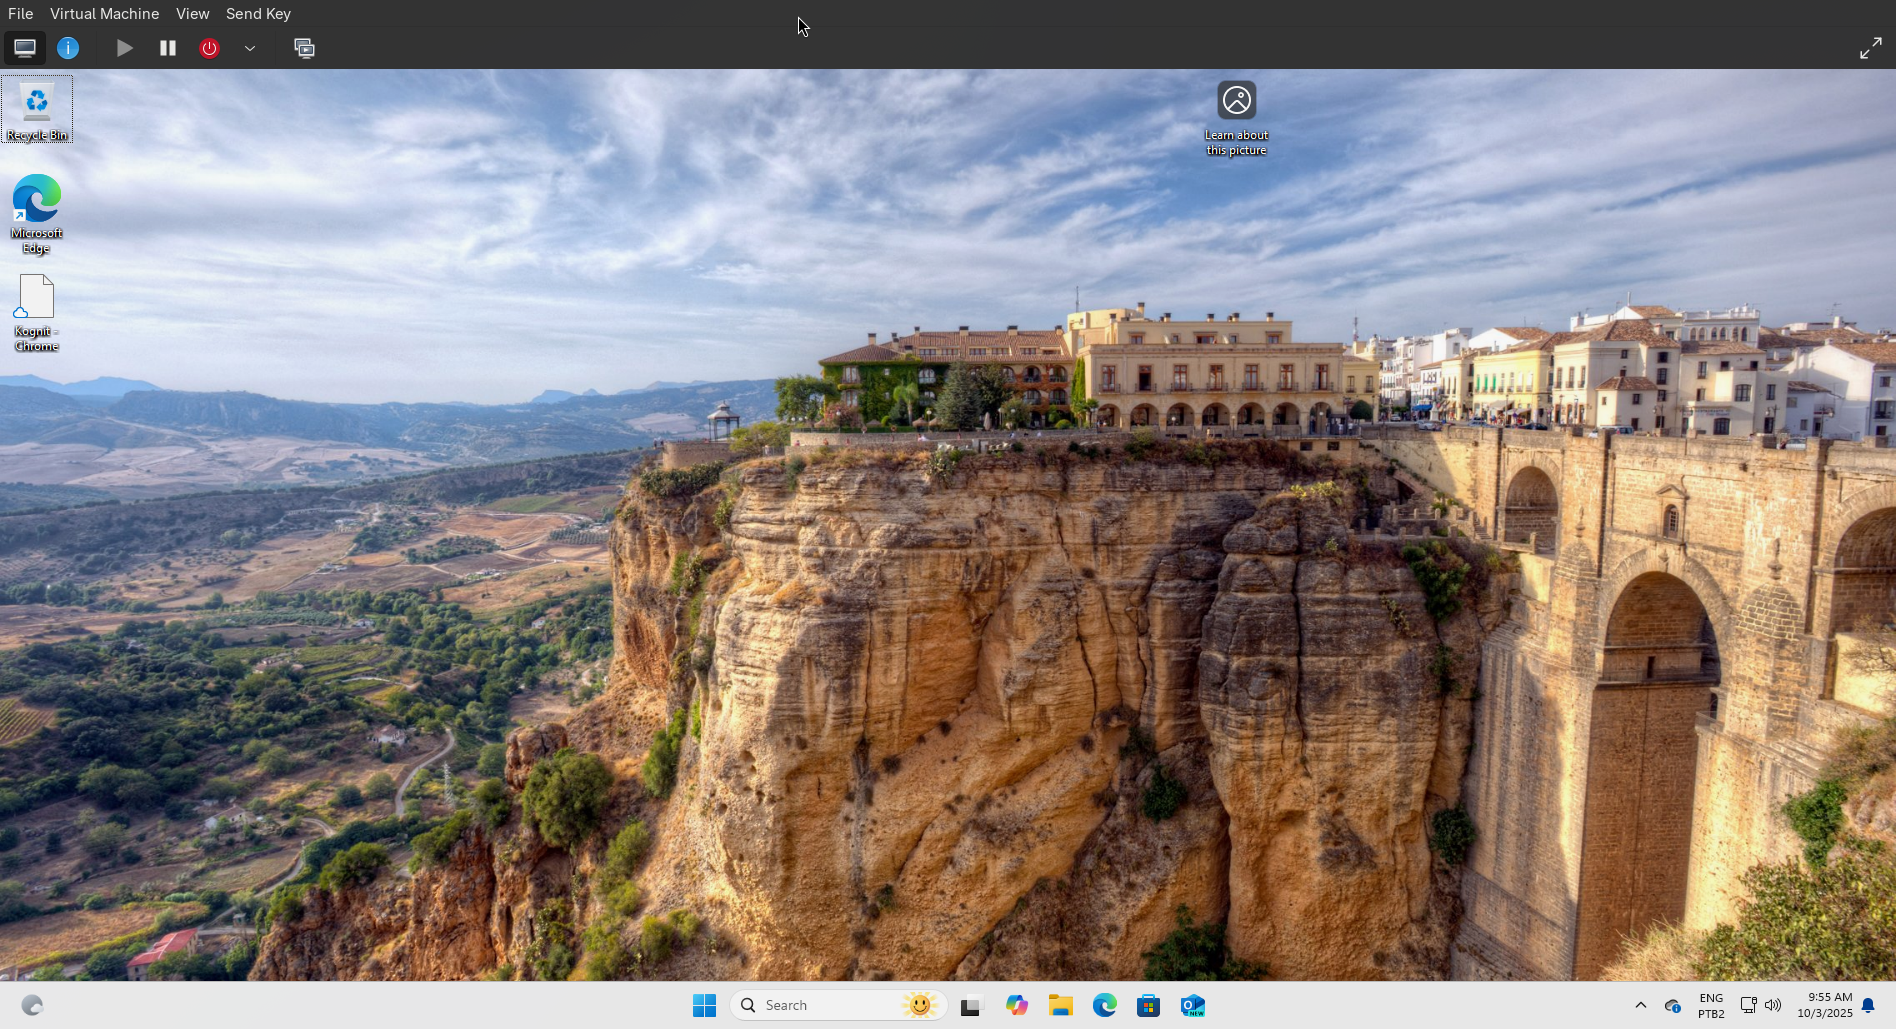
If everything worked, you’ll see an interface like this:

Now, click on the icon to create a new virtual machine and follow these steps:
Create Virtual Machine
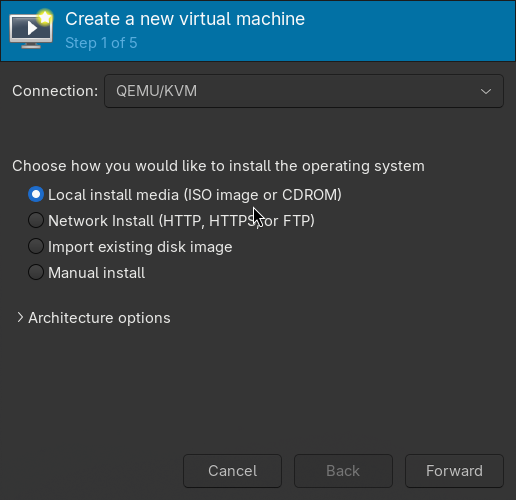
Here, keep the default options and click “Forward”.
Select ISO
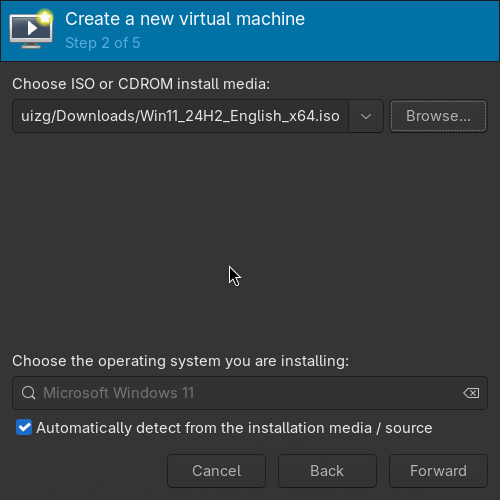
On this second screen, find the Windows 11 ISO you downloaded earlier by clicking “Browse” and then “Browse Local”.
After selecting the ISO, click “Forward”.
Configure Memory and CPU
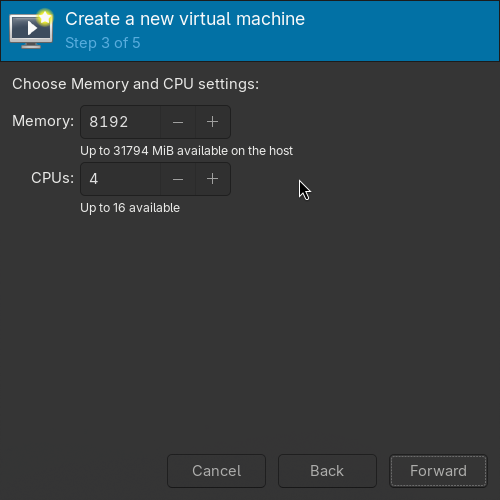
Here choose the amount of RAM and CPU you want to allocate to the virtual machine.
I recommend at least 8GB of RAM and 4 CPU cores for good performance.
After configuring, click “Forward”.
Configure Hard Drive

Here you can choose the size of the virtual hard drive. I recommend at least 64GB for Windows 11, but if you plan to install many programs, consider increasing this value, especially if you’re going to use it for gaming.
There’s also the possibility of using an entire existing disk with direct access, via Passthrough, but that’s a subject for another post and is more advanced.
Finish Configuration
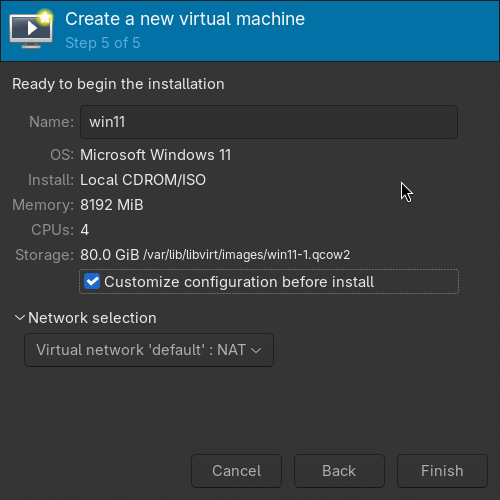
Now give the virtual machine a name and check the option “Customize configuration before install” to make some additional configurations.
Additional Configurations
In the Overview menu, change the firmware to UEFI x86_64: /usr/share/edk2/x64/OVMF_CODE.secboot.4m.fd
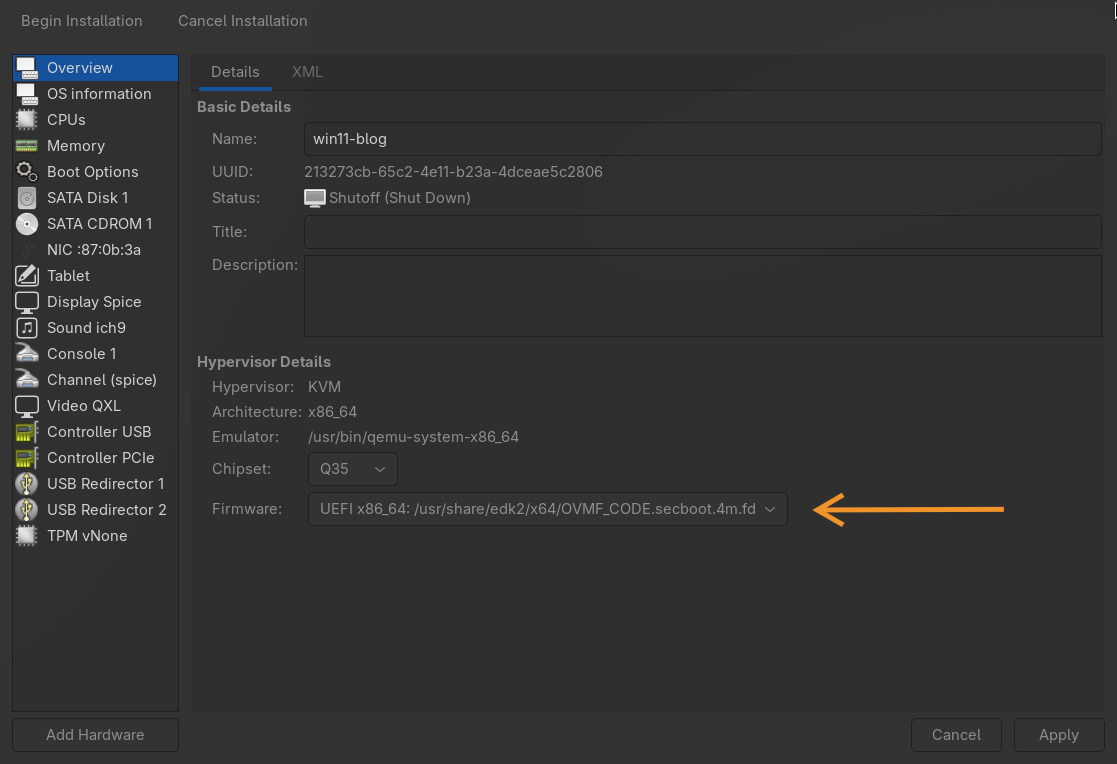
If you don’t have OVMF installed, you can install it with the following command:
sudo pacman -S edk2-ovmfClick “Apply”.
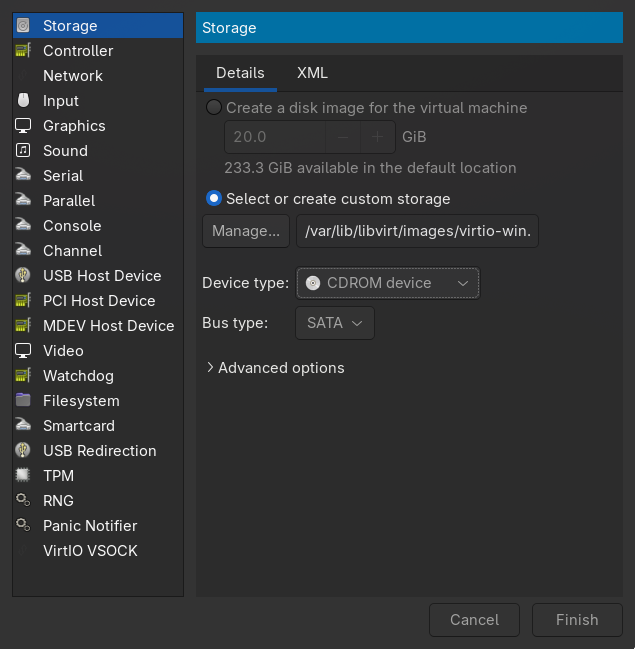
Now let’s add the VirtIO drivers you downloaded earlier.
Go to Add Hardware > Storage > Select or create custom storage > Browse Local and select the VirtIO drivers ISO file. Then change the device type to CDROM device and click Finish.
It’s also interesting to change the hard drive’s bus type to VirtIO to improve performance. Go to SATA Disk 1 and change the bus type to VirtIO. Click Apply.
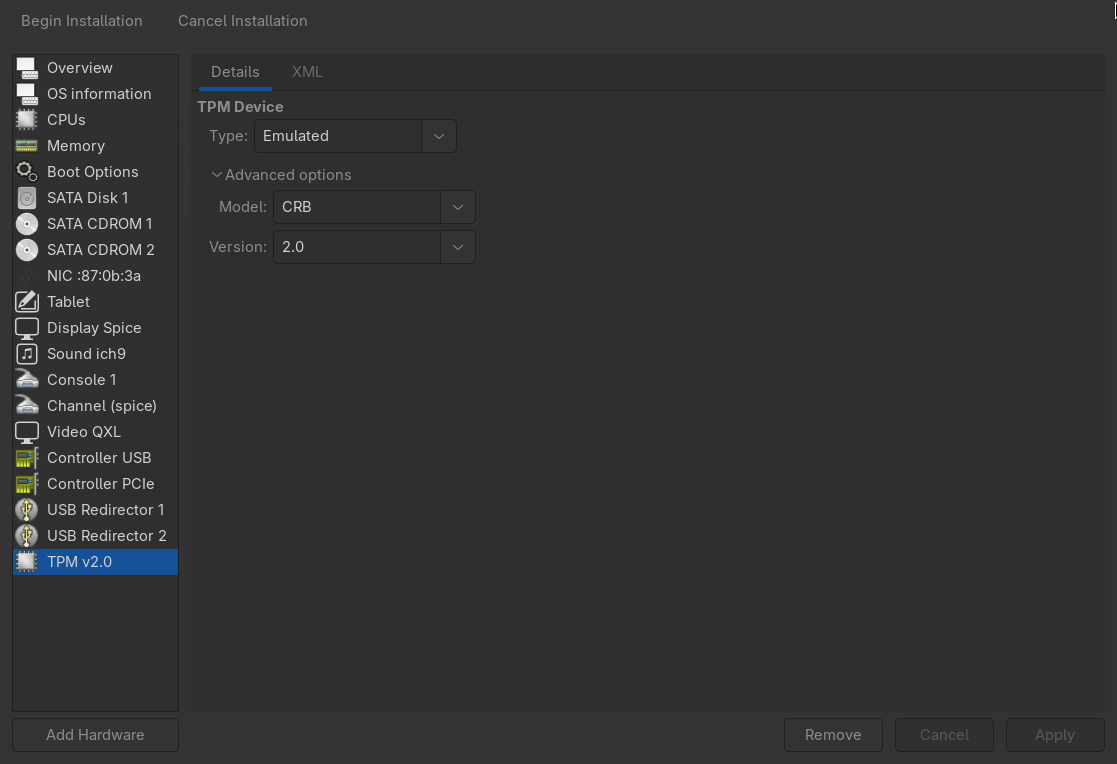
Finally, let’s emulate the TPM chip, which is required for Windows 11.
There should be a menu by default that says TPM vNone. Go to it, open the advanced options menu and select 2.0 in the version dropdown. Then click Apply.
Now you can start the installation by clicking Begin Installation.
Windows 11 Installation
When starting the installation, you’ll see on the screen to press any key to boot from CD/DVD. Press any key and you’ll be redirected to the Windows installation screen.
Do the initial language and keyboard configuration and click Next.
In the Product Key tab, if you have a key, enter it here. Otherwise, click I don't have a product key to continue the installation without the key.
In the image selection, select Windows 11 Home.
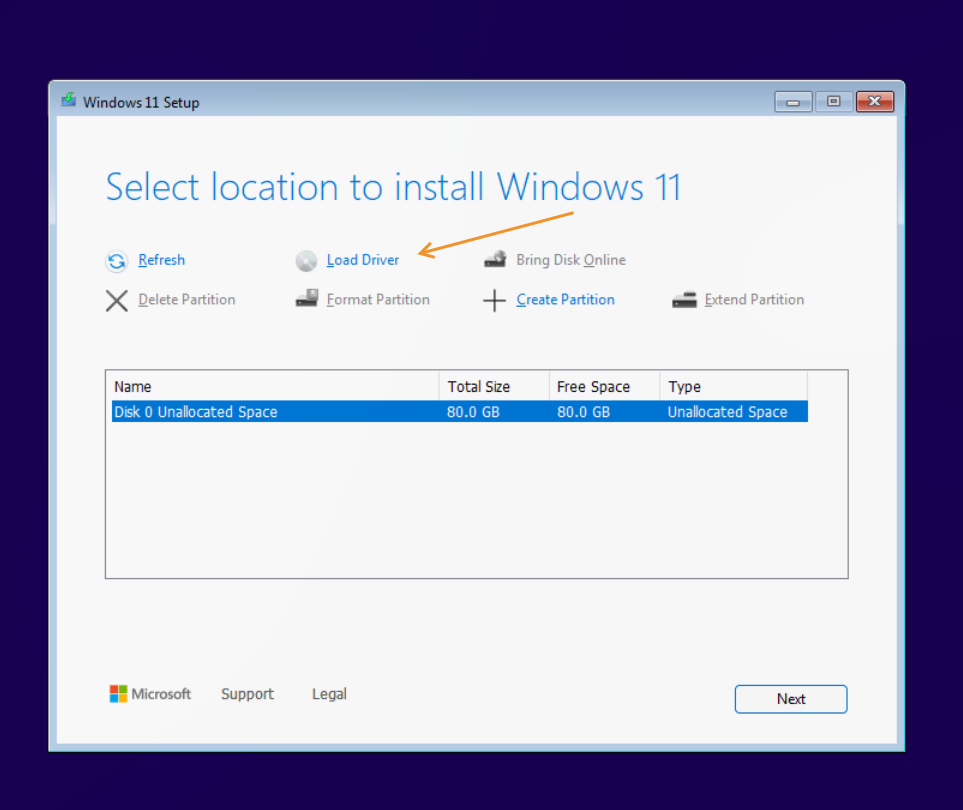
VirtIO Drivers Installation
On the disk selection screen, since we chose to use the virtio bus type, Windows doesn’t recognize the hard drive, so we need to load the VirtIO drivers.
If the disk appears (in case you kept SATA) the disk will appear, but still install the drivers as they are used for other devices as well.
To do this, go to Load Driver.
Open the CD-ROM drive and select the folder viostor\w11\amd64 and click OK.
Disable the option to show only compatible drivers and click install.
Then go again to Load Driver > Browse and select the folder NetKVM\w11\amd64 and click OK and install.
Now you can click Next and continue the installation normally.
The process may take a while, so be patient. On my machine it took about 15 minutes to complete and go to the initial Windows configuration part.
In this part, follow the steps to configure Windows as you prefer.
If an error screen appears saying it’s not possible to connect to the internet, probably the driver missed some network-related configuration mentioned earlier, so go back and check if everything is correct.
If you went to an update verification screen, most likely everything went well, and you just need to wait a bit longer.
Since Microsoft is annoying, it will ask you to log into a Microsoft account or create one, and so far I haven’t found out if it’s possible to skip this step, so create a Microsoft account or use one you already have.
Post-Installation Configuration
Once Windows is finally installed, let’s make some additional configurations to improve performance and integration with Linux.
Open file explorer and go to the CD-ROM drive where the VirtIO drivers are.
Run the virtio-win-gt-x64.msi installer and follow the steps to install all drivers.
Then install the virtio-win-guest-tools which will install the QEMU Guest Agent, which is a service that allows communication between the host and the virtual machine, enabling features such as safe shutdown, time synchronization, etc.
Once installed, you can go to the virt-manager menu View -> Scale to Display and enable Auto resize VM with window so that the virtual machine resolution automatically adjusts to the window size.
Now you can shut down the machine so we can make a few more configurations.
Host Configurations
Now that we have Windows installed, let’s make some additional configurations on the host to improve performance.
First, we can remove the CD-ROM with the VirtIO drivers, since we don’t need them anymore. To do this, select the CD-ROM from the hardware list and click Remove. It’s probably SATA CDROM 2.
If you want to use a camera, as in my case, I’m doing the installation on a laptop, to add the camera to the VM, just go to Add Hardware > USB Host Device and find your device and add it.
Additionally, at least on my laptop, I had problems with audio input, so I had to make the following configuration in the Overview tab by manually editing the configuration XML, replacing the audio part with this configuration:
<sound model="ich9">
  <codec type="duplex"/>
  <audio id="1"/>
  <address type="pci" domain="0x0000" bus="0x00" slot="0x1b" function="0x0"/>
</sound>
<audio id="1" type="pipewire" runtimeDir="/run/user/1000">
  <input name="alsa_input.pci-0000_00_1f.3-platform-skl_hda_dsp_generic.HiFi__Mic1__source" streamName="VM-Microphone" latency="100"/>
  <output name="default" streamName="VM-Audio" latency="15000"/>
</audio>
Since I use pipewire on my system, this configuration works perfectly, but if you use pulseaudio, you can try changing the type to pulseaudio and see if it works.
To set the input name, you can use the command pactl list sources short to list the available audio sources and find the one that corresponds to your microphone. (In my case I tested until I found the correct one).
After making these changes, click Apply.
Now you should have a Windows 11 virtual machine running on your Linux with QEMU/KVM, with good performance and integration.
Final Considerations
Well, the idea of this post was to document the process I followed to install Windows 11 on Linux using QEMU/KVM, so I can refer to it in the future if I need to do it again and to make it available to anyone else who might need it, since I myself had difficulties finding a complete and up-to-date guide on the subject.
In the future I intend to make more posts about advanced configurations, such as GPU passthrough, USB, CPU pinning, etc.
Additionally, I want to make it clear that this process may vary depending on the hardware and Linux distribution you’re using, so it’s always good to consult the official QEMU/KVM and VirtIO documentation for more details.
Also, obviously, as it’s a virtual machine, don’t expect performance equal to that of a native system, but with the right configurations, the performance can be very good and sufficient for most tasks.
In my case, I have a relatively powerful machine, with the following configuration:
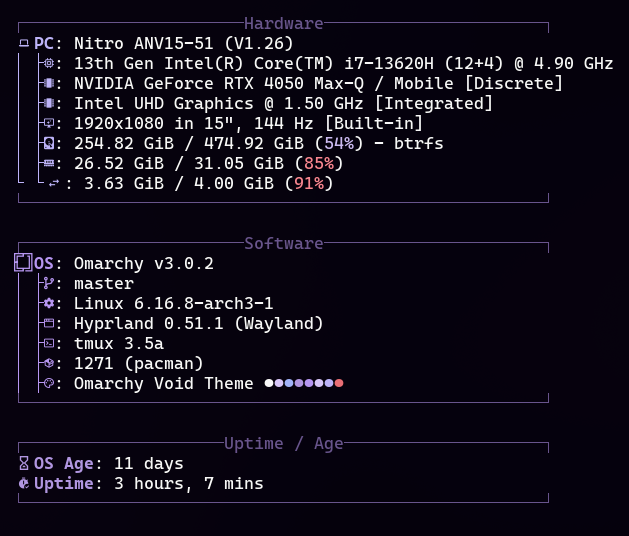
So I can allocate 16GB of RAM and 8 CPU cores to the virtual machine, which is more than enough for my use, while I can still use Linux normally.
This text was translated by AI.